Logto is an Auth0 alternative designed for modern apps and SaaS products. It offers both Cloud and Open-source services to help you quickly launch your identity and management (IAM) system. Enjoy authentication, authorization, and multi-tenant management all in one.
We recommend starting with a free development tenant on Logto Cloud. This allows you to explore all the features easily.
In this article, we will go through the steps to quickly build the Google sign-in experience (user authentication) with WordPress plugin and Logto.
Prerequisites
- A running Logto instance. Check out the introduction page to get started.
- Basic knowledge of WordPress plugin.
- A usable Google account.
Create an application in Logto
Logto is based on OpenID Connect (OIDC) authentication and OAuth 2.0 authorization. It supports federated identity management across multiple applications, commonly called Single Sign-On (SSO).
To create your Traditional web application, simply follow these steps:
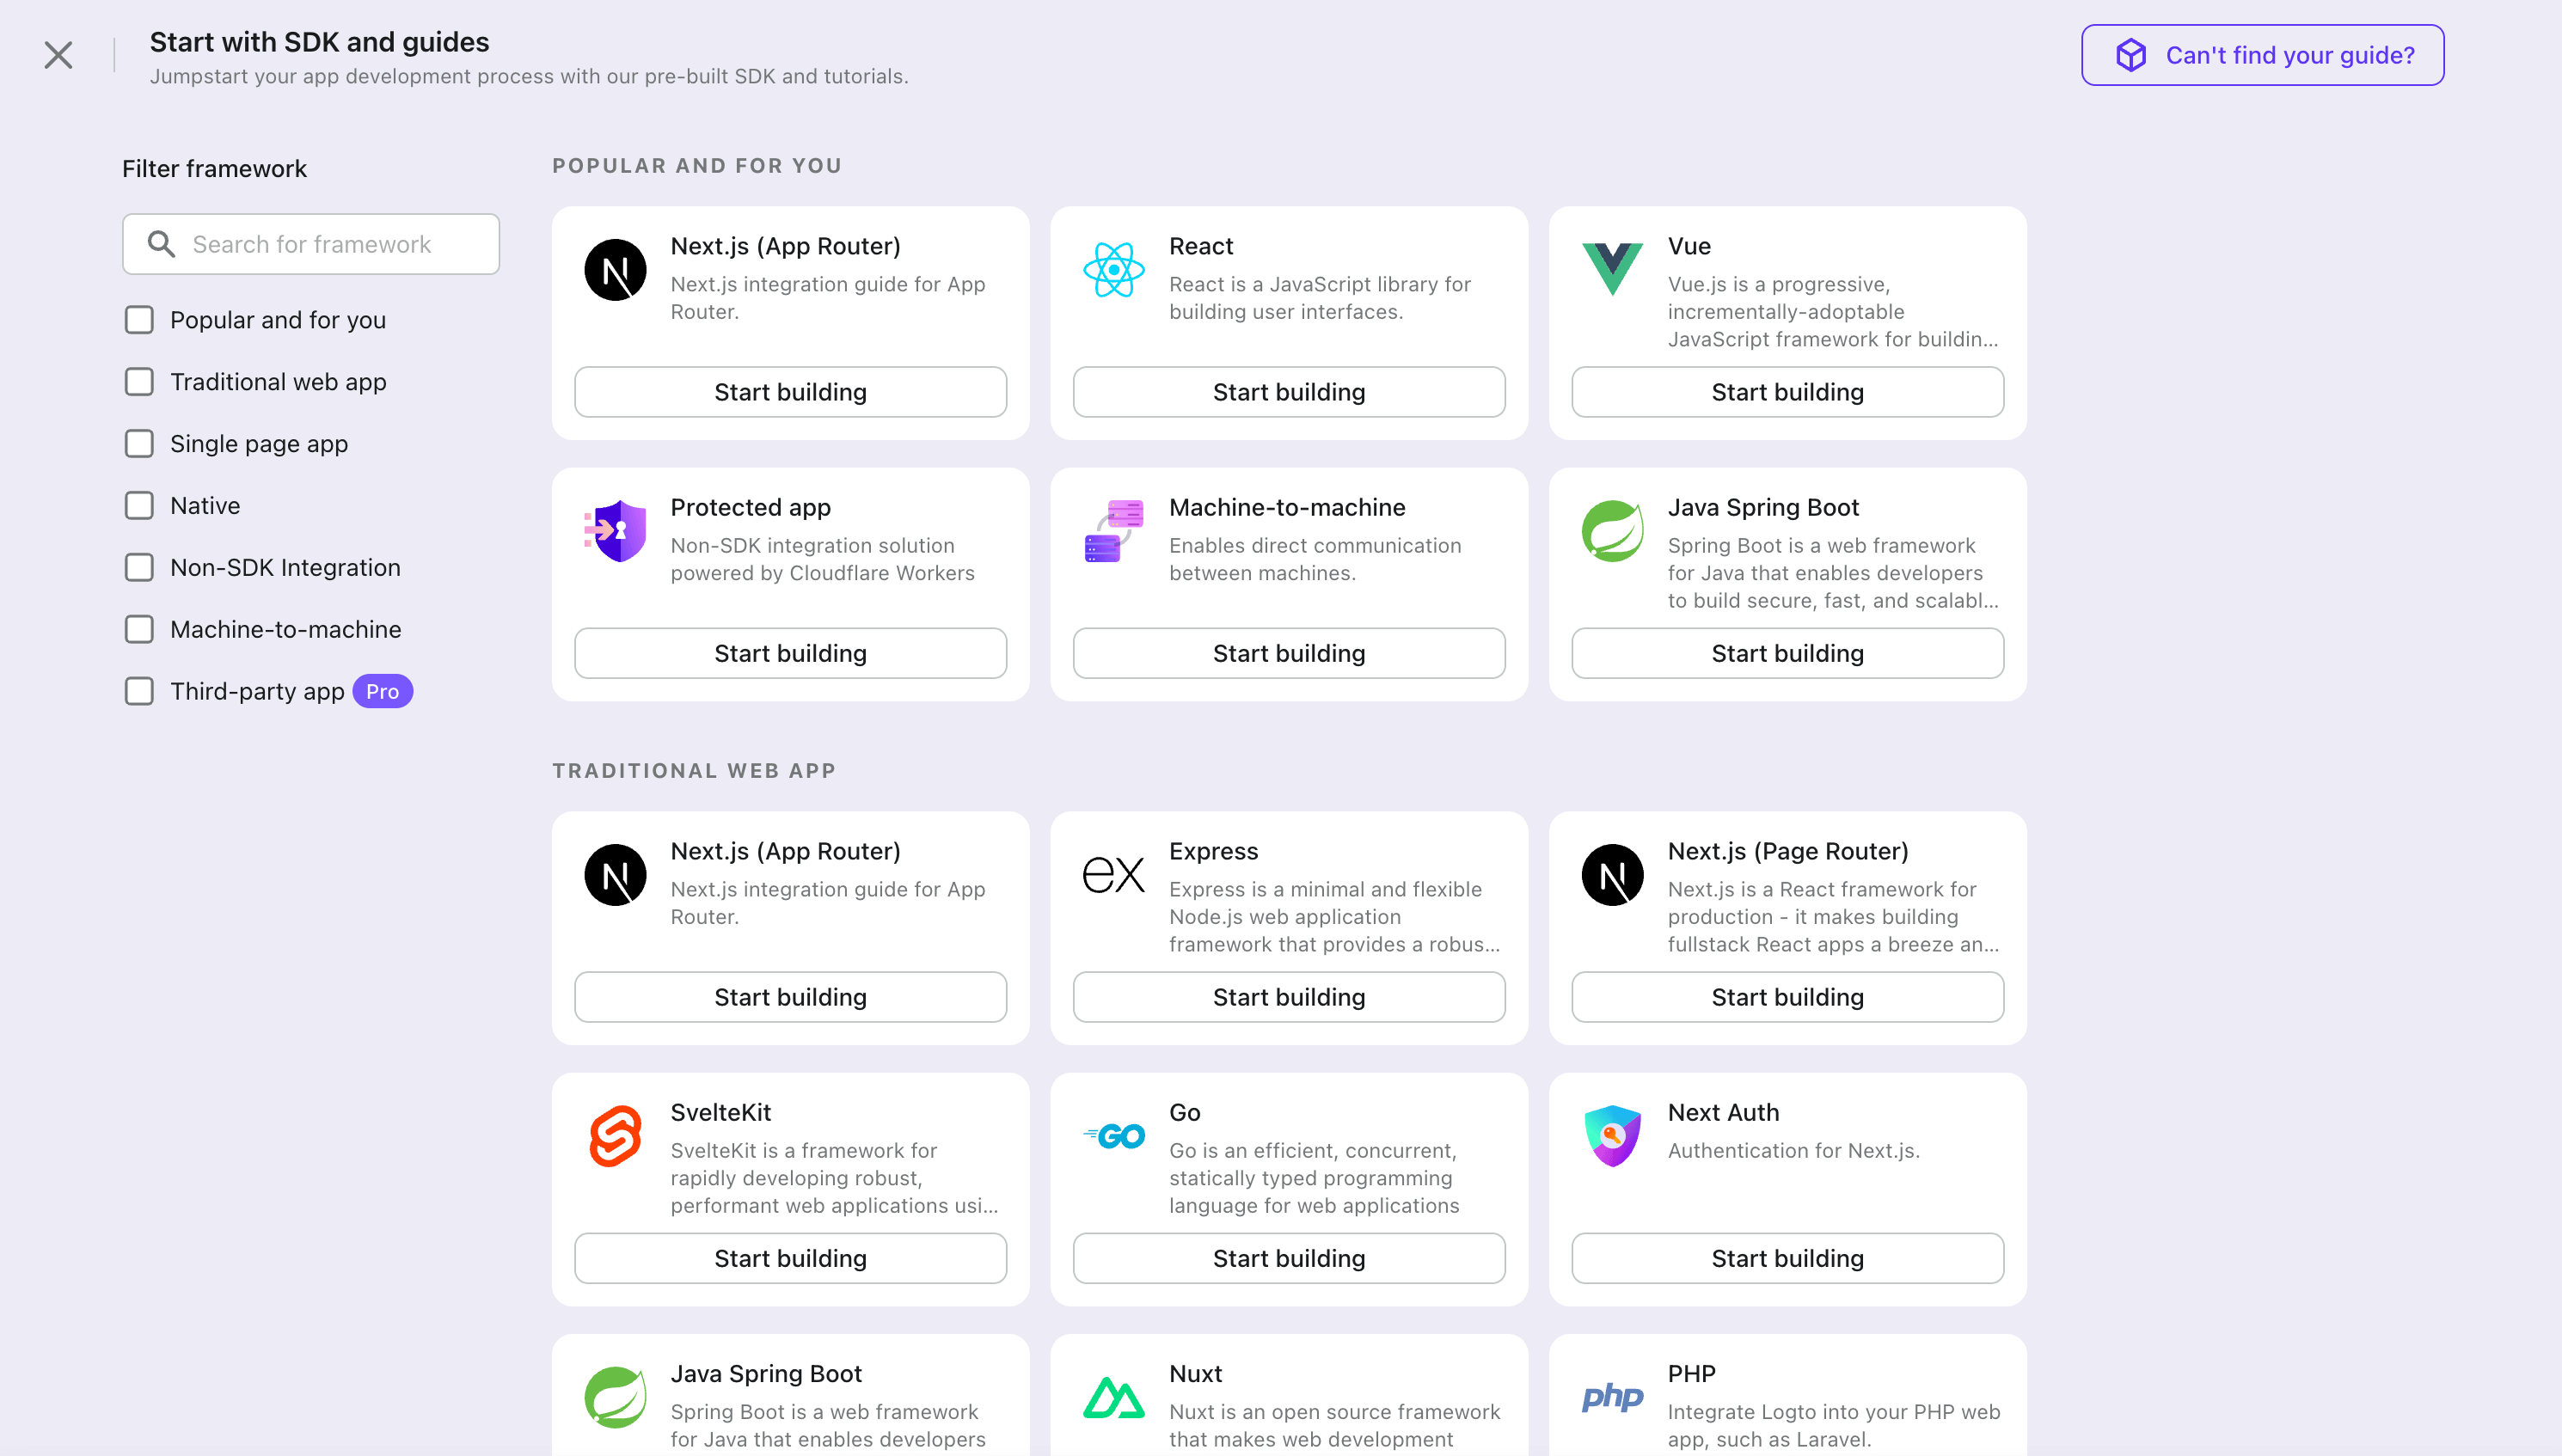
- Open the Logto Console. In the "Get started" section, click the "View all" link to open the application frameworks list. Alternatively, you can navigate to Logto Console > Applications, and click the "Create application" button.

- In the opening modal, click the "Traditional web" section or filter all the available "Traditional web" frameworks using the quick filter checkboxes on the left. Click the "WordPress" framework card to start creating your application.

- Enter the application name, e.g., "Bookstore," and click "Create application".
🎉 Ta-da! You just created your first application in Logto. You'll see a congrats page which includes a detailed integration guide. Follow the guide to see what the experience will be in your application.
Integrate WordPress with Logto
Install the plugin
- From WordPress admin panel
- From upload
- Go to Plugins > Add New.
- Search for "Logto", or enter https://wordpress.org/plugins/logto/ in the search box.
- Click Install Now.
- Click Activate.
- Download the Logto WordPress plugin from one of the following links:
- Latest release: Download the file which name in the format of
logto-plugin-<version>.zip. - WordPress plugin directory: Download the file by clicking the Download button.
- Latest release: Download the file which name in the format of
- Download the plugin ZIP file.
- Go to Plugins > Add New in your WordPress admin panel.
- Click Upload Plugin.
- Select the downloaded ZIP file and click Install Now.
- Click Activate.
Configure the plugin
Now you should be able to see the Logto menu in your WordPress admin panel sidebar. Click Logto > Settings to configure the plugin.
You should have a traditional web application created in Logto Console before configuring the plugin. If you haven't created one, please refer to Integrate Logto into your application for more information.
The minimum configuration to get started for the plugin is:
- Logto endpoint: The endpoint of your Logto tenant.
- App ID: The app ID of your Logto application.
- App secret: One of the valid app secrets of your Logto application.
All values can be found on the application details page in Logto Console.
After filling in the values, click Save Changes (scroll down to the bottom of the page if you can't find the button).
Configure redirect URI
The redirect URI is the URL to which Logto will redirect users after they have authenticated; and the post sign-out redirect URI is the URL to which Logto will redirect users after they have logged out.
Here's a non-normative sequence diagram to illustrate the sign-in flow:
Here's how the sign-out flow looks like in a non-normative sequence diagram:
To learn more about why redirect is needed, see Sign-in experience explained.
In our case, we need to configure both redirect URIs in your Logto Console. To find the redirect URI, go to the Logto > Settings page in your WordPress admin panel. You'll see the Redirect URI and Post sign-out redirect URI fields.
- Copy the Redirect URI and Post sign-out redirect URI values and paste them into the Redirect URIs and Post sign-out redirect URIs fields in your Logto Console.
- Click Save changes in Logto Console.
Checkpoint: Test your WordPress website
Now you can test your Logto integration in your WordPress website:
- Open an incognito browser window if needed.
- Visit your WordPress website and click the Log in link if applicable; or directly visit the login page (e.g.,
https://example.com/wp-login.php). - The page should redirect you to the Logto sign-in page.
- Complete the sign-in or sign-up process.
- After successful authentication, you should be redirected back to your WordPress website and logged in automatically.
- Click the Log out link to log out of your WordPress website.
- You should be redirected to the Logto sign-out page, then back to your WordPress website.
- You should be logged out of your WordPress website.
To learn more about the WordPress plugin settings, see WordPress quick start.
Add Google connector
To enable quick sign-in and improve user conversion, connect with WordPress as an identity provider. The Logto social connector helps you establish this connection in minutes by allowing several parameter inputs.
To add a social connector, simply follow these steps:
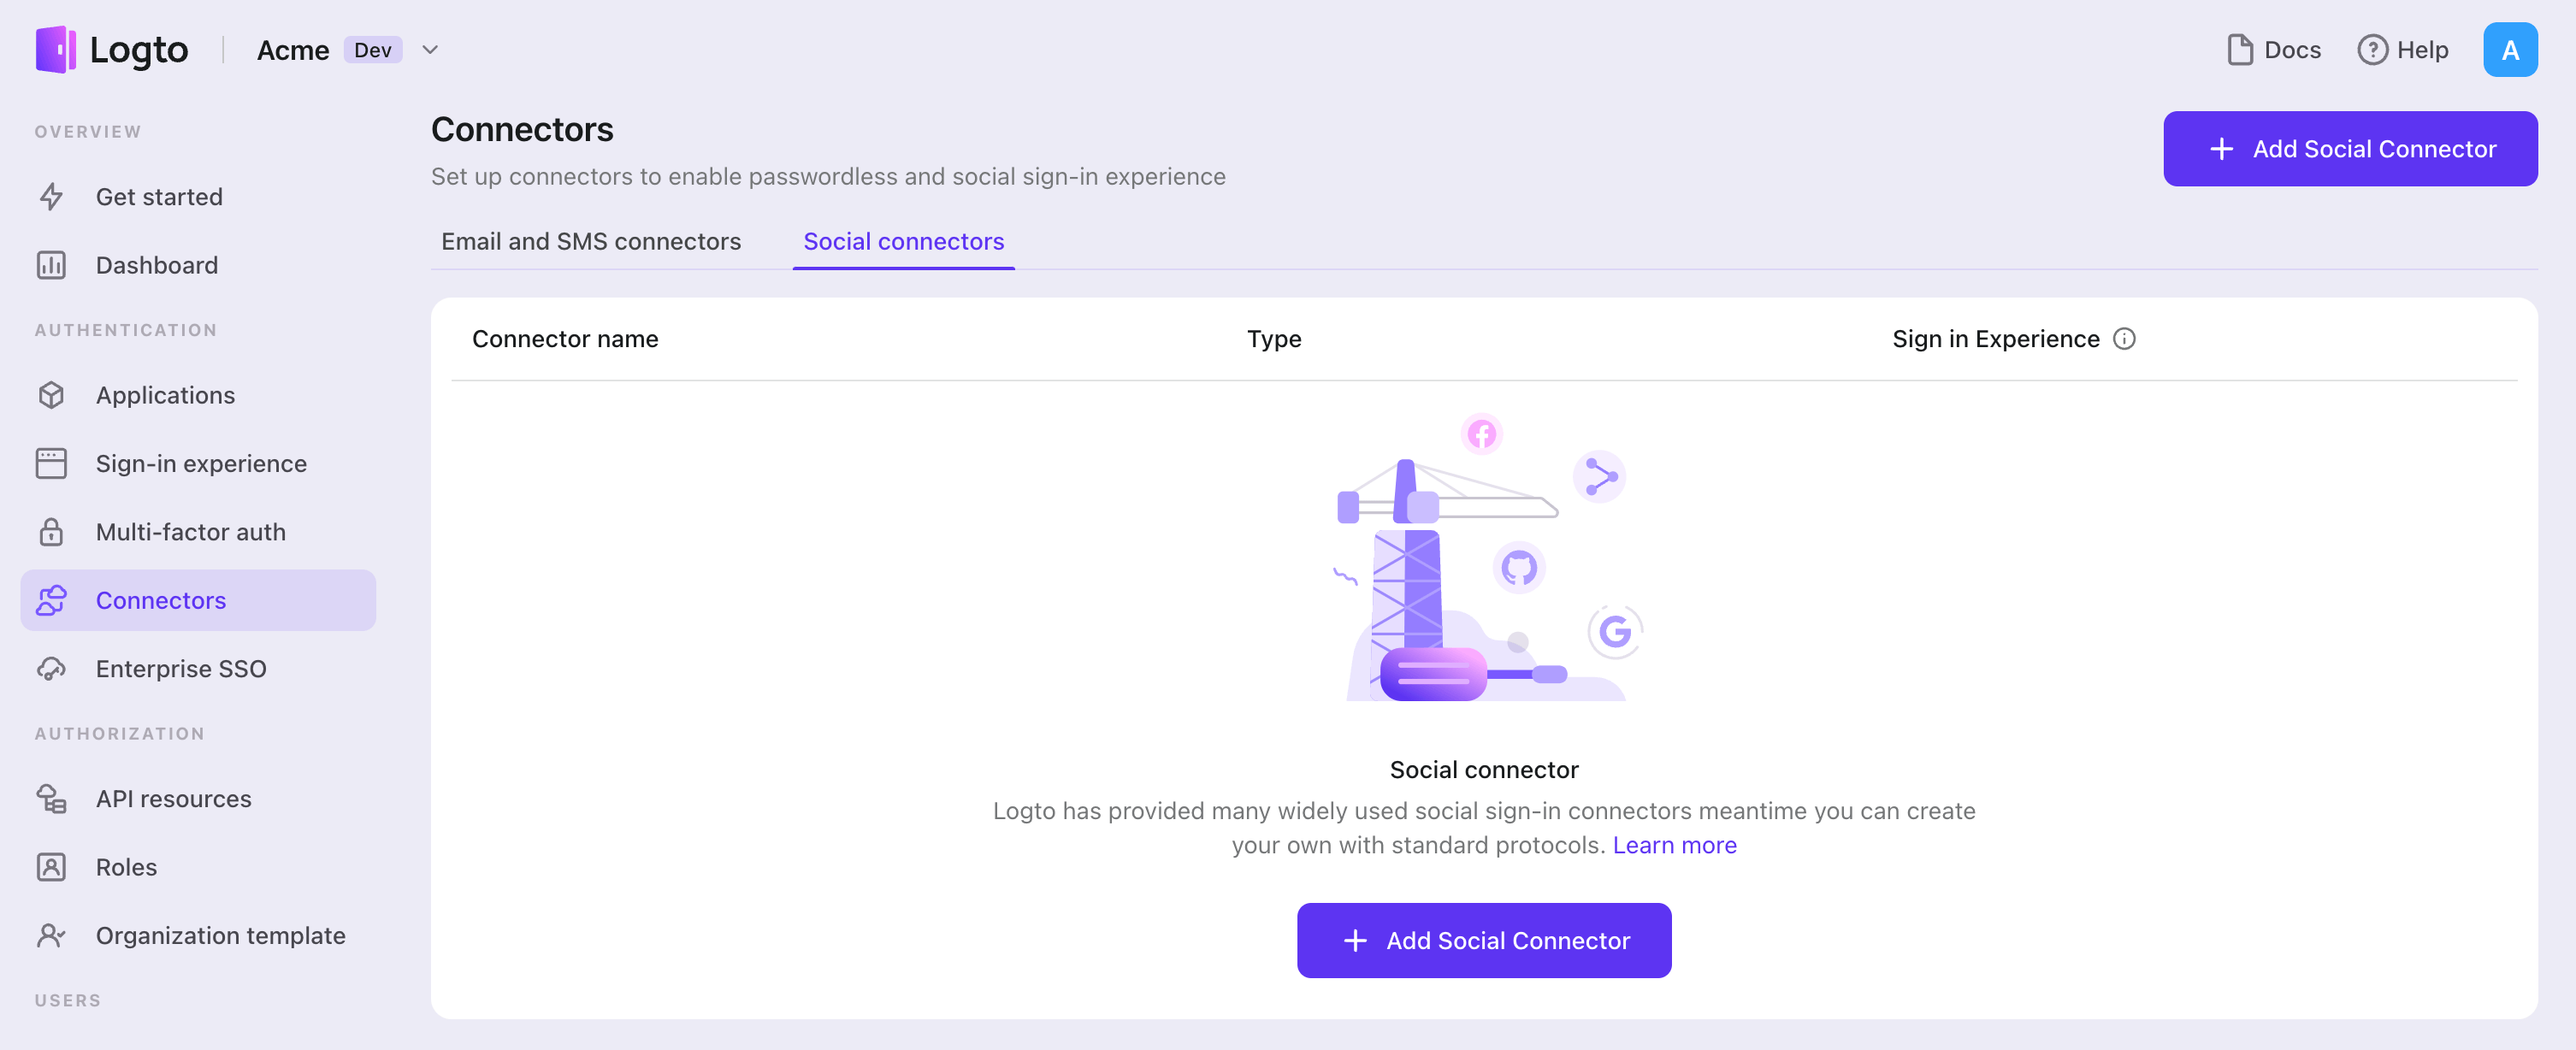
- Navigate to Console > Connectors > Social Connectors.
- Click "Add social connector" and select "Google".
- Follow the README guide and complete required fields and customize settings.

If you are following the in-place Connector guide, you can skip the next section.
Set up Google OAuth app
Step 1: Create a project on Google Auth Platform
Before you can use Google as an authentication provider, you must set up a project in the Google Cloud Console to obtain OAuth 2.0 credentials. If you already have a project, you can skip this step.
- Visit the Google Cloud Console and sign in with your Google account.
- Click the Select a project button on the top menu bar, then click the New Project button to create a project.
- In your newly created project, navigate to APIs & Services > OAuth consent screen to configure your app:
- App information: Enter the Application name and Support email to be displayed on the consent page
- Audience: Select your preferred audience type:
- Internal - Only for Google Workspace users within your organization
- External - For any Google user (requires verification for production use)
- Contact information: Provide email addresses so Google can notify you about any changes to your project
- Check I agree to Google's policies to finish the basic setup
- Optionally, go to the Branding section to edit product info and upload your App logo, which will appear on the OAuth consent screen to help users recognize your app.
If you choose External audience type, you'll need to add test users during development and publish your app for production use.
Step 2: Create OAuth 2.0 credentials
Navigate to the Credentials page in Google Cloud Console and create OAuth credentials for your application.
- Click Create Credentials > OAuth client ID.
- Select Web application as the application type.
- Fill in the Name of your OAuth client. This helps you identify the credentials and is not shown to end users.
- Configure the authorized URIs:
- Authorized JavaScript origins: Add your Logto instance's origin (e.g.,
https://your-logto-domain.com) - Authorized redirect URIs: Add the Logto Callback URI (copy this from your Logto Google connector)
- Authorized JavaScript origins: Add your Logto instance's origin (e.g.,
- Click Create to generate the OAuth client.
Step 3: Configure Logto connector with credentials
After creating the OAuth client, Google will display a modal with your credentials:
- Copy the Client ID and paste it into the
clientIdfield in Logto - Copy the Client secret and paste it into the
clientSecretfield in Logto - Click Save and Done in Logto to connect your identity system with Google
Keep your client secret secure and never expose it in client-side code. If compromised, generate a new one immediately.
Step 4: Configure scopes
Scopes define the permissions your app requests from users and control which data your app can access from their Google accounts.
Configure scopes in Google Cloud Console
- Navigate to APIs & Services > OAuth consent screen > Scopes.
- Click Add or Remove Scopes and select only the scopes your app requires:
- Authentication (Required):
https://www.googleapis.com/auth/userinfo.emailhttps://www.googleapis.com/auth/userinfo.profileopenid
- API access (Optional): Add any additional scopes needed for your app (e.g., Drive, Calendar, YouTube). Browse the Google API Library to find available services. If your app needs access to Google APIs beyond basic permissions, first enable the specific APIs your app will use (e.g., Google Drive API, Gmail API, Calendar API) in the Google API Library.
- Authentication (Required):
- Click Update to confirm the selection.
- Click Save and Continue to apply the changes.
Configure scopes in Logto
Choose one or more of the following approaches based on your needs:
Option 1: No extra API scopes needed
- Leave the
Scopesfield in your Logto Google connector blank. - The default scopes
openid profile emailwill be requested to ensure Logto can get basic user info properly.
Option 2: Request additional scopes at sign-in
- Enter all desired scopes in the Scopes field, separated by spaces.
- Any scopes you list here override the defaults, so always include the authentication scopes:
https://www.googleapis.com/auth/userinfo.email https://www.googleapis.com/auth/userinfo.profile openid. - Use full scope URLs. Example:
https://www.googleapis.com/auth/calendar.readonly.
Option 3: Request incremental scopes later
- After the user signs in, you can request additional scopes on demand by reinitiating a federated social authorization flow and updating users' stored token set.
- These additional scopes do not need to be filled in the
Scopesfield in your Logto Google connector, and can be achieved through Logto's Social Verification API.
By following these steps, your Logto Google connector requests exactly the permissions your app needs - no more, no less.
If your app requests these scopes to access the Google API and perform actions, make sure to enable Store tokens for persistent API access in Logto Google connector. See the next section for details.
Step 5: Customize authentication prompts
Configure Prompts in Logto to control the user authentication experience. Prompts is an array of strings that specifies the type of user interaction required:
none- The authorization server does not display any authentication or consent screens. Returns an error if the user is not already authenticated and has not pre-configured consent for the requested scopes. Use this to check for existing authentication and/or consent.consent- The authorization server prompts the user for consent before returning information to the client. Required to enable offline access for Google API access.select_account- The authorization server prompts the user to select a user account. This allows users with multiple Google accounts to choose which account to use for authentication.
Step 6: General settings
Here are some general settings that won't block the connection to Google but may affect the end-user authentication experience.
Sync profile information
In the Google connector, you can set the policy for syncing profile information, such as user names and avatars. Choose from:
- Only sync at sign-up: Profile info is fetched once when the user first signs in.
- Always sync at sign-in: Profile info is updated every time the user signs in.
Store tokens to access Google APIs (Optional)
If you want to access Google APIs and perform actions with user authorization (whether via social sign-in or account linking), Logto needs to get specific API scopes and store tokens.
- Add the required scopes in your Google Cloud Console OAuth consent screen configuration and Logto Google connector.
- Enable Store tokens for persistent API access in Logto Google connector. Logto will securely store Google access and refresh tokens in the Secret Vault.
- To ensure refresh tokens are returned, configure your Logto Google connector as follows:
- Set Prompts to include
consent - Enable Offline Access
- Set Prompts to include
You do not need to add offline_access in the Logto Scope field — doing so may cause an error. Google uses access_type=offline automatically when offline access is enabled.
Step 7: Enable Google One Tap (Optional)
Google One Tap is a secure and streamlined way to let users sign in to your website with their Google account using a popup interface.
Once you have the Google connector set up, you'll see a card for Google One Tap in the connector details page. Enable Google One Tap by toggling the switch.
Google One Tap configuration options
- Auto-select credential if possible - Automatically sign in the user with the Google account if certain conditions are met
- Cancel the prompt if user clicks/taps outside - Close the Google One Tap prompt if the user clicks or taps outside the prompt. If disabled, the user must click the close button to dismiss the prompt.
- Enable Upgraded One Tap UX on ITP browsers - Enable the upgraded Google One Tap user experience on Intelligent Tracking Prevention (ITP) browsers. Refer to this documentation for more information.
Make sure to add your domain to the Authorized JavaScript origins section in your OAuth client configuration. Otherwise, Google One Tap cannot be displayed.
Important limitations with Google One Tap
If you enable Store tokens for persistent API access along with Google One Tap, you won't automatically receive an access token or the requested scopes.
Google One Tap sign-in (unlike the standard "Sign in with Google" button) does not issue an OAuth access token. It only returns an ID token (a signed JWT) that verifies the user's identity, but does not grant API access.
To access Google APIs with Google One Tap users, you can use Logto's Social Verification API to reinitiate a federated social authorization flow after the user signs in with Google One Tap. This allows you to request additional scopes as needed and update the user's stored token set, without requiring the scopes to be pre-filled in the Logto Google connector. This approach enables incremental authorization, so users are only prompted for extra permissions when your app actually needs them.
Learn more about Google One Tap limitations in the official documentation.
Step 8: Test and publish your app
For Internal apps
If your Audience type in Google is set to Internal, your app will be available only to Google Workspace users within your organization. You can test using any account from your organization.
For External apps
If your Audience type is External:
- During development: Navigate to OAuth consent screen > Test users and add test user email addresses. Only these users can sign in with your app.
- For production: Click Publish App in the OAuth consent screen section to make it available to anyone with a Google Account.
Apps with sensitive or restricted scopes may require Google's verification before they can be published. This process can take several weeks.
Save your configuration
Double check you have filled out necessary values in the Logto connector configuration area. Click "Save and Done" (or "Save changes") and the Google connector should be available now.
Enable Google connector in Sign-in Experience
Once you create a social connector successfully, you can enable it as a "Continue with Google" button in Sign-in Experience.
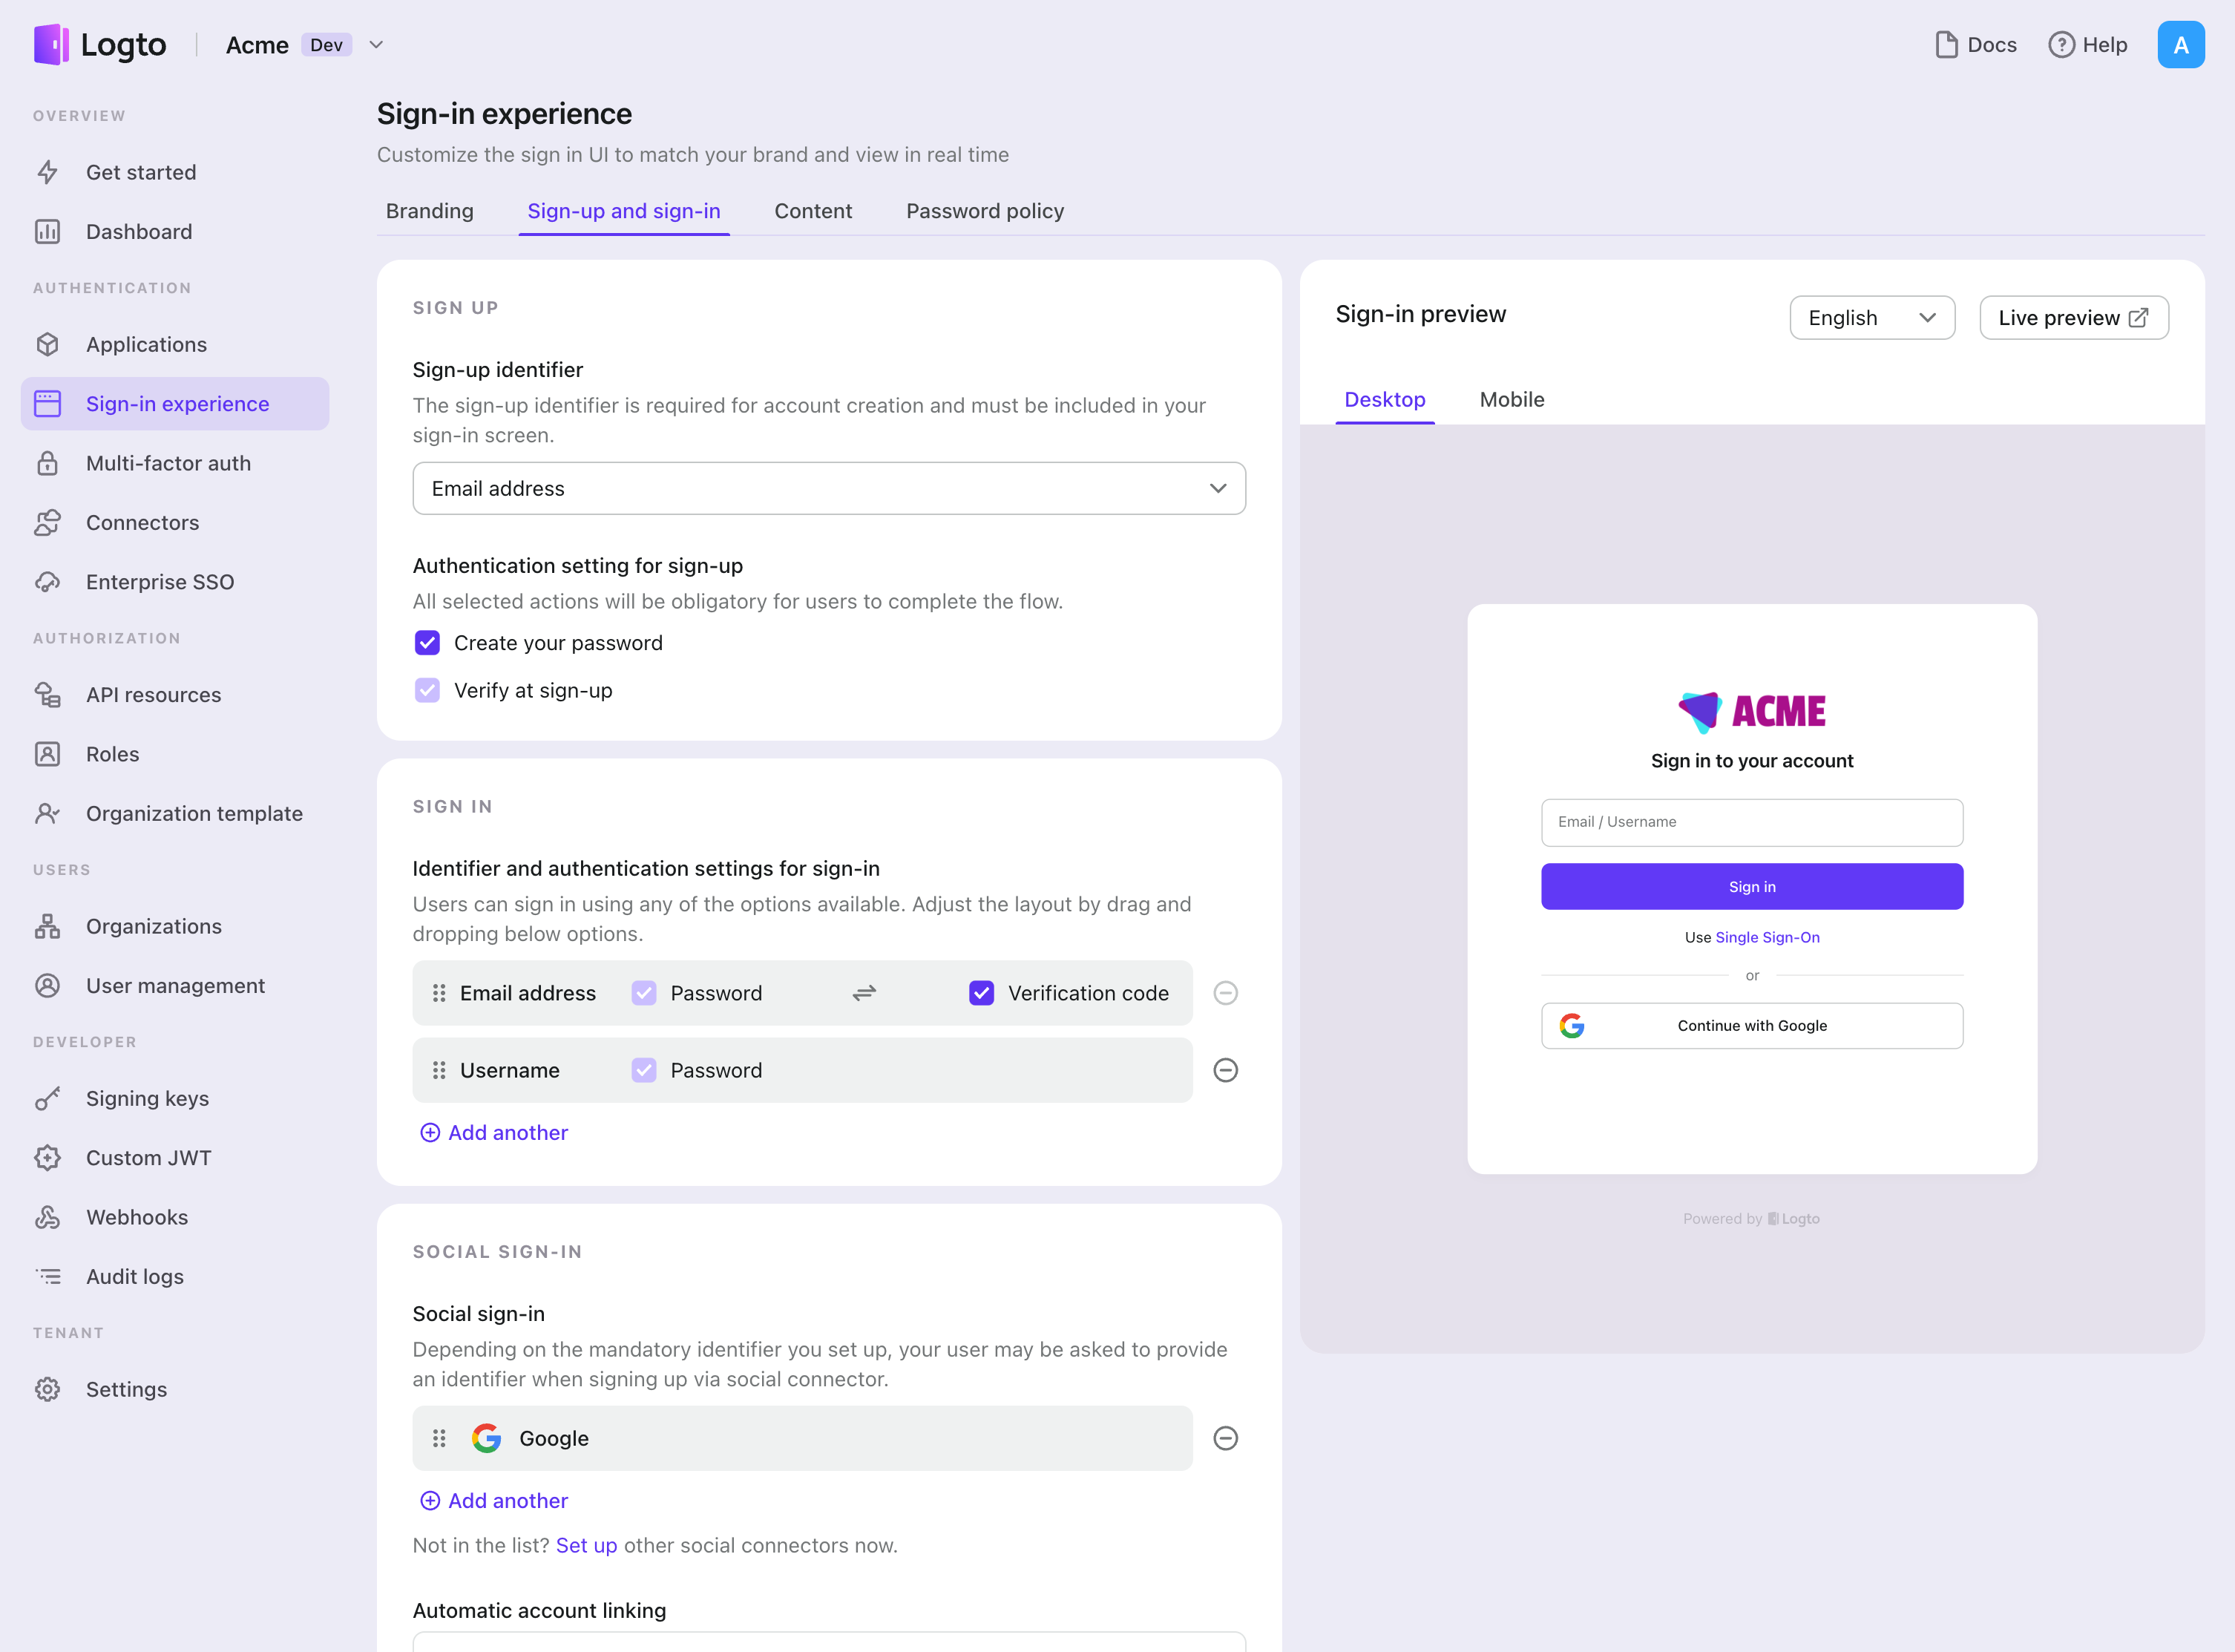
- Navigate to Console > Sign-in experience > Sign-up and sign-in.
- (Optional) Choose "Not applicable" for sign-up identifier if you need social login only.
- Add configured Google connector to the "Social sign-in" section.

Testing and Validation
Return to your WordPress plugin app. You should now be able to sign in with Google. Enjoy!
Further readings
End-user flows: Logto provides a out-of-the-box authentication flows including MFA and enterprise SSO, along with powerful APIs for flexible implementation of account settings, security verification, and multi-tenant experience.
Authorization: Authorization defines the actions a user can do or resources they can access after being authenticated. Explore how to protect your API for native and single-page applications and implement Role-based Access Control (RBAC).
Organizations: Particularly effective in multi-tenant SaaS and B2B apps, the organization feature enable tenant creation, member management, organization-level RBAC, and just-in-time-provisioning.
Customer IAM series Our serial blog posts about Customer (or Consumer) Identity and Access Management, from 101 to advanced topics and beyond.