Logto is an Auth0 alternative designed for modern apps and SaaS products. It offers both Cloud and Open-source services to help you quickly launch your identity and management (IAM) system. Enjoy authentication, authorization, and multi-tenant management all in one.
We recommend starting with a free development tenant on Logto Cloud. This allows you to explore all the features easily.
In this article, we will go through the steps to quickly build the Facebook sign-in experience (user authentication) with Flutter and Logto.
Prerequisites
- A running Logto instance. Check out the introduction page to get started.
- Basic knowledge of Flutter.
- A usable Facebook account.
Create an application in Logto
Logto is based on OpenID Connect (OIDC) authentication and OAuth 2.0 authorization. It supports federated identity management across multiple applications, commonly called Single Sign-On (SSO).
To create your Native app application, simply follow these steps:
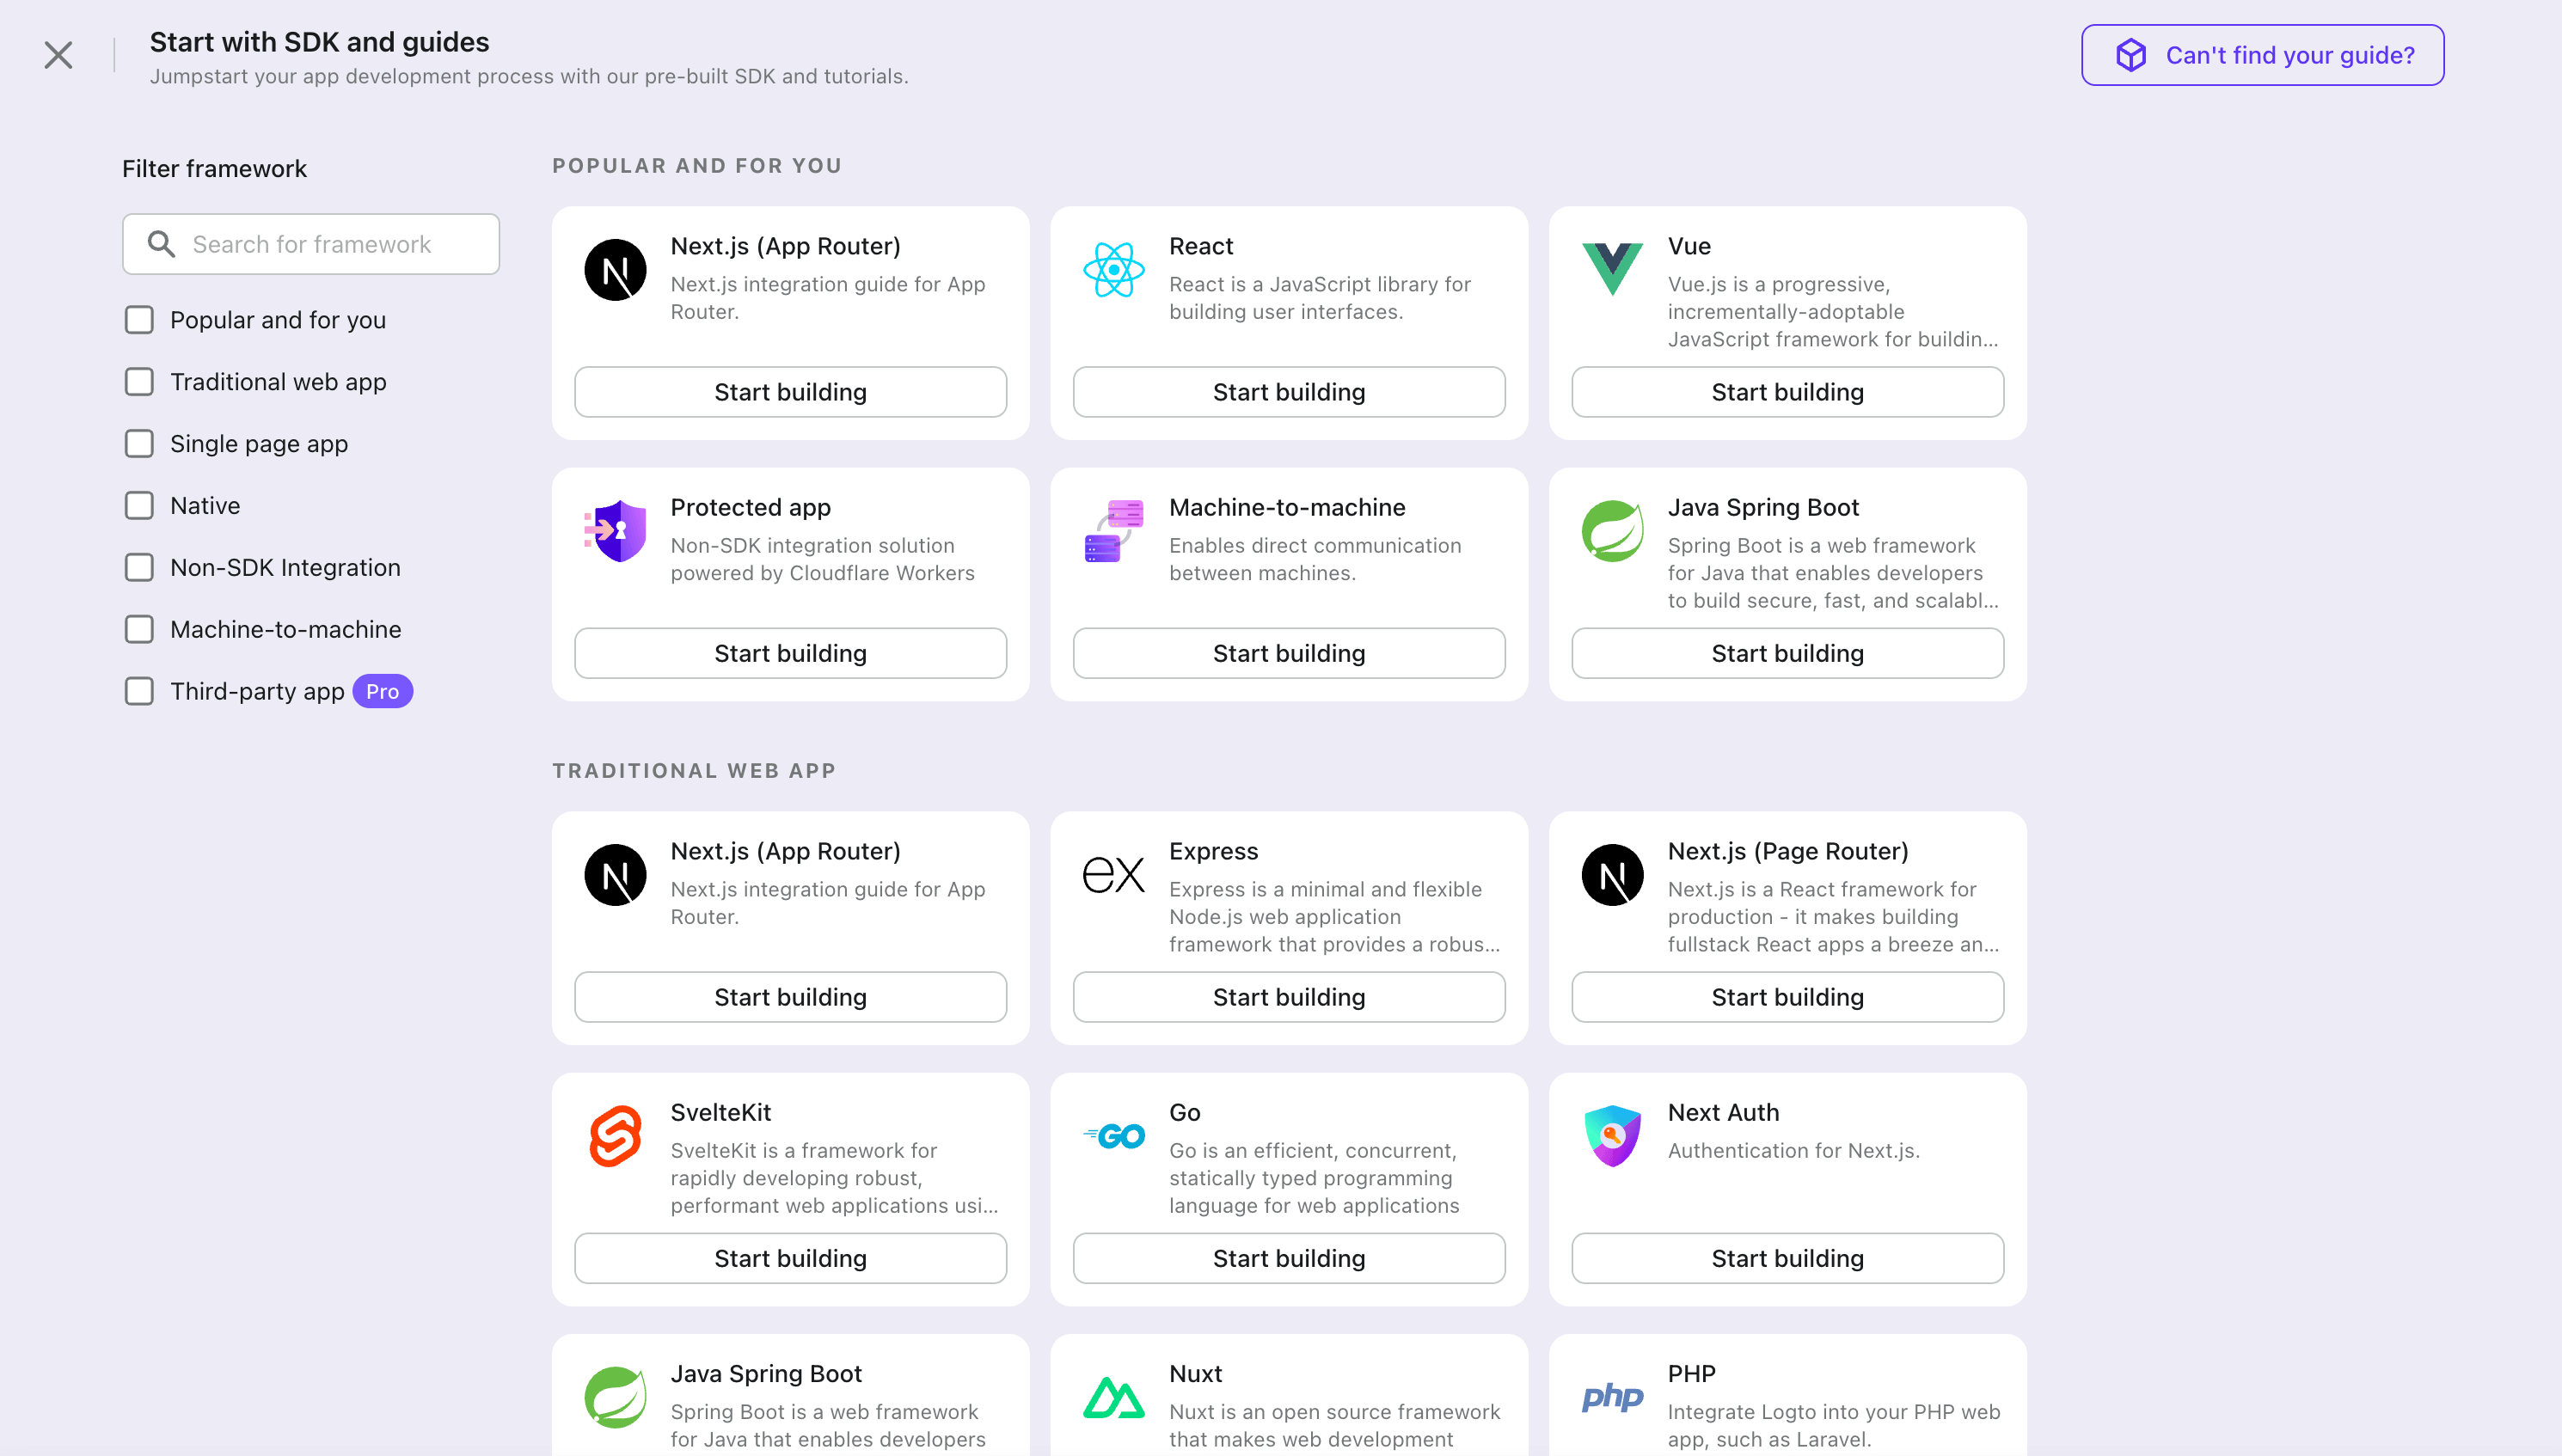
- Open the Logto Console. In the "Get started" section, click the "View all" link to open the application frameworks list. Alternatively, you can navigate to Logto Console > Applications, and click the "Create application" button.

- In the opening modal, click the "Native app" section or filter all the available "Native app" frameworks using the quick filter checkboxes on the left. Click the "Flutter" framework card to start creating your application.

- Enter the application name, e.g., "Bookstore," and click "Create application".
🎉 Ta-da! You just created your first application in Logto. You'll see a congrats page which includes a detailed integration guide. Follow the guide to see what the experience will be in your application.
Integrate Flutter with Logto
- The SDK package is available on pub.dev and Logto GitHub repository.
- The sample project is built using Flutter material. You can find it on pub.dev.
- This SDK is compatible with Flutter applications on iOS, Android, and Web platforms. Compatibility with other platforms has not been tested.
Installation
- pub.dev
- GitHub
You can install the logto_dart_sdk package directly using the pub package manager.
Run the following command under your project root:
flutter pub add logto_dart_sdk
Or add the following to your pubspec.yaml file:
dependencies:
  logto_dart_sdk: ^3.0.0
Then run:
flutter pub get
If you prefer to fork your own version of the SDK, you can clone the repository directly from GitHub.
git clone https://github.com/logto-io/dart
Dependency and configurations
SDK version compatibility
| Logto SDK version | Dart SDK version | Dart 3.0 compatible |
|---|---|---|
| < 2.0.0 | >= 2.17.6 < 3.0.0 | false |
| >= 2.0.0 < 3.0.0 | >= 3.0.0 | true |
| >= 3.0.0 | >= 3.6.0 | true |
flutter_secure_storage set up
Under the hood, this SDK uses flutter_secure_storage to implement the cross-platform persistent secure token storage.
- Keychain is used for iOS
- AES encryption is used for Android.
Config Android version
Set the android:minSdkVersion to >= 18 in your project's android/app/build.gradle file.
  android {
      ...

      defaultConfig {
          ...
          minSdkVersion 18
          ...
      }
  }
Disable auto backup on Android
By default Android backups data on Google Drive. It can cause exception java.security.InvalidKeyException:Failed to unwrap key. To avoid this,
-
To disable auto backup, go to your app manifest file and set the
android:allowBackupandandroid:fullBackupContentattributes tofalse.AndroidManifest.xml<manifest ... >
...
<application
android:allowBackup="false"
android:fullBackupContent="false"
...
>
...
</application>
</manifest> -
Exclude
sharedprefsfromFlutterSecureStorage.If you need to keep the
android:fullBackupContentfor your app rather than disabling it, you can exclude thesharedprefsdirectory from the backup. See more details in the Android documentation.In your AndroidManifest.xml file, add the android:fullBackupContent attribute to the
<application>element, as shown in the following example. This attribute points to an XML file that contains backup rules.AndroidManifest.xml<application ...
android:fullBackupContent="@xml/backup_rules">
</application>Create an XML file called
@xml/backup_rulesin theres/xml/directory. In this file, add rules with the<include>and<exclude>elements. The following sample backs up all shared preferences except device.xml:@xml/backup_rules<?xml version="1.0" encoding="utf-8"?>
<full-backup-content>
<exclude domain="sharedpref" path="FlutterSecureStorage"/>
</full-backup-content>
Please check flutter_secure_storage for more details.
flutter_web_auth_2 set up
Behind the scenes, this SDK uses flutter_web_auth_2 to authenticate users with Logto. This package provides a simple way to authenticate users with Logto using the system webview or browser.
This plugin uses ASWebAuthenticationSession on iOS 12+ and macOS 10.15+, SFAuthenticationSession on iOS 11, Chrome Custom Tabs on Android and opens a new window on Web.
-
iOS: No additional setup required
-
Android: Register the callback url on Android
In order to capture the callback url from Logto's sign-in web page, you will need to register your sign-in redirectUri to your
AndroidManifest.xmlfile.AndroidManifest.xml<manifest>
<application>
<activity
android:name="com.linusu.flutter_web_auth_2.CallbackActivity"
android:exported="true">
<intent-filter android:label="flutter_web_auth_2">
<action android:name="android.intent.action.VIEW" />
<category android:name="android.intent.category.DEFAULT" />
<category android:name="android.intent.category.BROWSABLE" />
<data android:scheme="YOUR_CALLBACK_URL_SCHEME_HERE" />
</intent-filter>
</activity>
</application>
</manifest> -
Web browser: Create an endpoint to handle the callback URL
If you are using the web platform, you need to create an endpoint to handle the callback URL and send it back to the application using the
postMessageAPI.callback.html<!doctype html>
<title>Authentication complete</title>
<p>Authentication is complete. If this does not happen automatically, please close the window.</p>
<script>
function postAuthenticationMessage() {
const message = {
'flutter-web-auth-2': window.location.href,
};
if (window.opener) {
window.opener.postMessage(message, window.location.origin);
window.close();
} else if (window.parent && window.parent !== window) {
window.parent.postMessage(message, window.location.origin);
} else {
localStorage.setItem('flutter-web-auth-2', window.location.href);
window.close();
}
}
postAuthenticationMessage();
</script>
Please check the setup guide in the flutter_web_auth_2 package for more details.
Integration
Init LogtoClient
Import the logto_dart_sdk package and initialize the LogtoClient instance at the root of your application.
import 'package:logto_dart_sdk/logto_dart_sdk.dart';
import 'package:http/http.dart' as http;
void main() async {
WidgetsFlutterBinding.ensureInitialized();
runApp(const MyApp());
}
class MyApp extends StatelessWidget {
const MyApp({Key? key}) : super(key: key);
Widget build(BuildContext context) {
return const MaterialApp(
title: 'Flutter Demo',
home: MyHomePage(title: 'Logto Demo Home Page'),
);
}
}
class MyHomePage extends StatefulWidget {
const MyHomePage({Key? key, required this.title}) : super(key: key);
final String title;
State<MyHomePage> createState() => _MyHomePageState();
}
class _MyHomePageState extends State<MyHomePage> {
late LogtoClient logtoClient;
void render() {
// state change
}
// LogtoConfig
final logtoConfig = const LogtoConfig(
endpoint: "<your-logto-endpoint>",
appId: "<your-app-id>"
);
void _init() {
logtoClient = LogtoClient(
config: logtoConfig,
httpClient: http.Client(), // Optional http client
);
render();
}
void initState() {
super.initState();
_init();
}
// ...
}
Implement sign-in
Before we dive into the details, here's a quick overview of the end-user experience. The sign-in process can be simplified as follows:
- Your app invokes the sign-in method.
- The user is redirected to the Logto sign-in page. For native apps, the system browser is opened.
- The user signs in and is redirected back to your app (configured as the redirect URI).
Regarding redirect-based sign-in
- This authentication process follows the OpenID Connect (OIDC) protocol, and Logto enforces strict security measures to protect user sign-in.
- If you have multiple apps, you can use the same identity provider (Logto). Once the user signs in to one app, Logto will automatically complete the sign-in process when the user accesses another app.
To learn more about the rationale and benefits of redirect-based sign-in, see Logto sign-in experience explained.
Before starting, you need to add a redirect URI in the Admin Console for your application.
Let's switch to the Application details page of Logto Console. Add a Redirect URI io.logto://callback and click "Save changes".

- For iOS, the redirect URI scheme does not really matter since the
ASWebAuthenticationSessionclass will listen to the redirect URI regardless of if it's registered. - For Android, the redirect URI scheme must be registered in the
AndroidManifest.xmlfile.
After the redirect URI is configured, we add a sign-in button to your page, which will call logtoClient.signIn API to invoke the Logto sign-in flow:
class _MyHomePageState extends State<MyHomePage> {
// ...
final redirectUri = 'io.logto://callback';
Widget build(BuildContext context) {
// ...
Widget signInButton = TextButton(
onPressed: () async {
await logtoClient.signIn(redirectUri);
render();
},
child: const Text('Sign In'),
);
return Scaffold(
appBar: AppBar(
title: Text(widget.title),
),
body: Center(
child: Column(
mainAxisAlignment: MainAxisAlignment.center,
children: <Widget>[
SelectableText('My Demo App'),
signInButton,
],
),
),
);
}
}
Implement sign-out
Let's switch to the Application details page of Logto Console. Add a Post Sign-out Redirect
URI io.logto://callback and click "Save changes".

Post Sign-outRedirect URI is an OAuth 2.0 concept which implies the location should redirect after signing out.
Now let's add a sign-out button on the main page so users can sign out from your application.
class _MyHomePageState extends State<MyHomePage> {
// ...
final postSignOutRedirectUri = 'io.logto//home';
Widget build(BuildContext context) {
// ...
Widget signOutButton = TextButton(
onPressed: () async {
await logtoClient.signOut(postSignOutRedirectUri);
render();
},
child: const Text('Sign Out'),
);
return Scaffold(
appBar: AppBar(
title: Text(widget.title),
),
body: Center(
child: Column(
mainAxisAlignment: MainAxisAlignment.center,
children: <Widget>[
SelectableText('My Demo App'),
signInButton,
signOutButton,
],
),
),
);
}
}
Handle authentication status
Logto SDK provides an asynchronous method to check the authentication status. The method is logtoClient.isAuthenticated. The method returns a boolean value, true if the user is authenticated, otherwise false.
In the example we conditionally render the sign-in and sign-out buttons based on the authentication status. Now let's update the render method in our Widget to handle the state change:
class _MyHomePageState extends State<MyHomePage> {
// ...
bool? isAuthenticated = false;
void render() {
setState(() async {
isAuthenticated = await logtoClient.isAuthenticated;
});
}
Widget build(BuildContext context) {
// ...
return Scaffold(
appBar: AppBar(
title: Text(widget.title),
),
body: Center(
child: Column(
mainAxisAlignment: MainAxisAlignment.center,
children: <Widget>[
SelectableText('My Demo App'),
isAuthenticated == true ? signOutButton : signInButton,
],
),
),
);
}
}
Checkpoint: Test your application
Now, you can test your application:
- Run your application, you will see the sign-in button.
- Click the sign-in button, the SDK will init the sign-in process and redirect you to the Logto sign-in page.
- After you signed in, you will be redirected back to your application and see the sign-out button.
- Click the sign-out button to clear token storage and sign out.
Add Facebook connector
To enable quick sign-in and improve user conversion, connect with Flutter as an identity provider. The Logto social connector helps you establish this connection in minutes by allowing several parameter inputs.
To add a social connector, simply follow these steps:
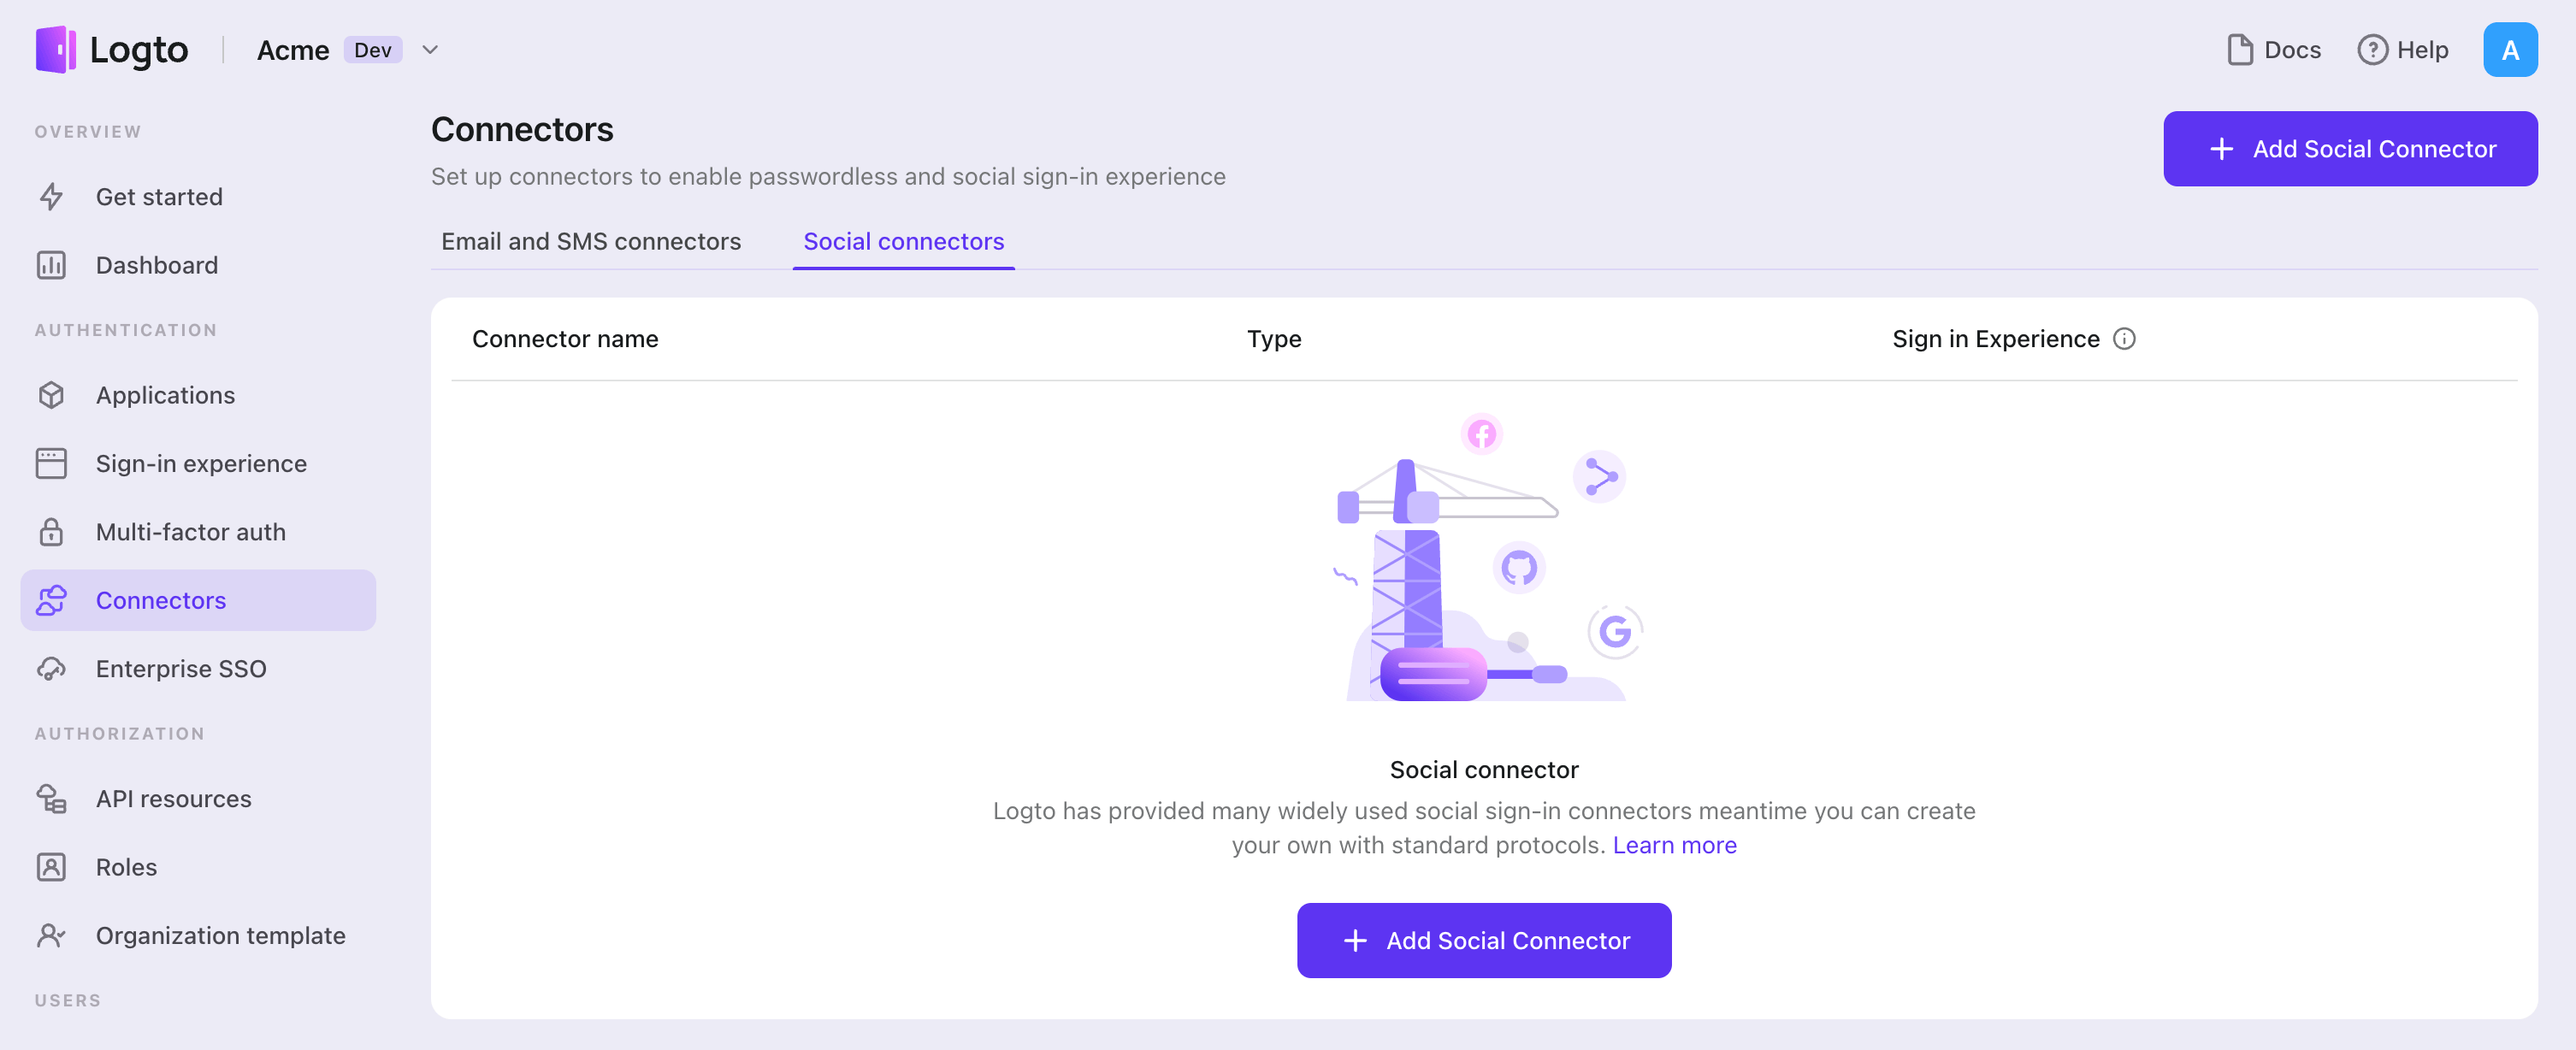
- Navigate to Console > Connectors > Social Connectors.
- Click "Add social connector" and select "Facebook".
- Follow the README guide and complete required fields and customize settings.

If you are following the in-place Connector guide, you can skip the next section.
Set up Facebook login
Step 1: Set up an app on Facebook App Dashboard
Before you can use Facebook as an authentication provider, you must set up an app on the Facebook developer platform to obtain OAuth 2.0 credentials.
- Register as a Facebook Developer if you don't already have an account.
- Visit the Apps page.
- Click your existing app or create a new one if needed.
A use case is the primary way your app will interact with Meta and determines which APIs, features, permissions, and products are available to your app. If you need social authentication only (to get email & public_profile), select "Authentication and request data from users with Facebook Login". If you want to access Facebook APIs, choose your preferred use cases - most of them also support integrating "Facebook Login for business" after app creation.
- After app creation, on the app dashboard page, navigate to Use cases > Facebook Login > Settings or Facebook Login for business > Settings.
- Fill in the Valid OAuth Redirect URIs with the Logto Callback URI (copy this from your Logto Facebook connector). After users sign in with Facebook, they'll be redirected here with an authorization code that Logto uses to finish authentication.
- Navigate to Use cases and click Customize of your use case to add the scopes. We recommend adding
emailandpublic_profilewhich are required to implement Sign-in with Facebook in Logto.
Step 2: Set up Logto connector with client credentials
- In the Facebook App Dashboard, click the sidebar App settings > Basic.
- You will see the App ID and App secret on the panel.
- Click the Show button next to the App secret input box to reveal and copy its content.
- Configure your Logto Facebook connector settings:
- Fill the
clientIdfield with the App ID. - Fill the
clientSecretfield with the App secret. - Click Save and Done in Logto to connect your identity system with Facebook.
- Fill the
Step 3: Configure scopes
Scopes define the permissions your app requests from users and control which private data your project can access from their Facebook accounts.
Configure scopes in Facebook App Dashboard
- Navigate to Facebook App Dashboard > Use cases and click the Customize button.
- Add only the scopes your app needs. Users will review and authorize these permissions on the Facebook consent screen:
- For authentication (Required):
emailandpublic_profile. - For API access (Optional): Any additional scopes your app needs (e.g.,
threads_content_publish,threads_read_repliesfor accessing the Threads API). Browse the Meta Developer Documentation for available services.
- For authentication (Required):
Configure scopes in Logto
Choose one or more of the following approaches based on your needs:
Option 1: No extra API scopes needed
- Leave the
Scopesfield in your Logto Facebook connector blank. - The default scope
email public_profilewill be requested to ensure Logto can get basic user info properly.
Option 2: Request additional scopes at sign-in
- Enter all desired scopes in the Scopes field, separated by spaces.
- Any scopes you list here override the defaults, so always include the authentication scopes:
email public_profile.
Option 3: Request incremental scopes later
- After the user signs in, you can request additional scopes on demand by reinitiating a federated social authorization flow and updating users' stored token set.
- These additional scopes do not need to be filled in the
Scopesfield in your Logto Facebook connector, and can be achieved through Logto's Social Verification API.
By following these steps, your Logto Facebook connector requests exactly the permissions your app needs - no more, no less.
If your app requests these scopes to access the Facebook API and perform actions, make sure to enable Store tokens for persistent API access in Logto Facebook connector. See the next section for details.
Step 4: General settings
Here are some general settings that won't block the connection to Facebook but may affect the end-user authentication experience.
Sync profile information
In the Facebook connector, you can set the policy for syncing profile information, such as user names and avatars. Choose from:
- Only sync at sign-up: Profile info is fetched once when the user first signs in.
- Always sync at sign-in: Profile info is updated every time the user signs in.
Store tokens to access Facebook APIs (Optional)
If you want to access Facebook APIs and perform actions with user authorization (whether via social sign-in or account linking), Logto needs to get specific API scopes and store tokens.
- Add the required scopes following the tutorial above.
- Enable Store tokens for persistent API access in the Logto Facebook connector. Logto will securely store Facebook access tokens in the Secret Vault.
Facebook doesn't provide refresh tokens. However, when token storage is enabled, Logto automatically requests a long-lived access token (60 days) upon user authentication. During this period, users can manually revoke access tokens, but otherwise won't need re-authorization to access Facebook APIs. Note: Don't add offline_access to the Scope field as this may cause errors.
Step 5: Test sign-in with Facebook's test users (Optional)
You can use test, developer, and admin user accounts to test sign-in with the app. You can also publish the app directly so that any Facebook user can sign in.
- In the Facebook App Dashboard, click the sidebar App roles > Test Users.
- Click the Create test users button to create a testing user.
- Click the Options button of an existing test user to see more operations, such as "Change name and password".
Step 6: Publish Facebook sign-in settings
Usually, only test, admin, and developer users can sign in with the app. To enable normal Facebook users to sign in with the app in the production environment, you may need to publish this app.
- In the Facebook App Dashboard, click the sidebar Publish.
- Fill out the Privacy Policy URL and User data deletion fields if required.
- Click the Save changes button at the bottom right corner.
- Click the Live switch button on the app top bar.
Save your configuration
Double check you have filled out necessary values in the Logto connector configuration area. Click "Save and Done" (or "Save changes") and the Facebook connector should be available now.
Enable Facebook connector in Sign-in Experience
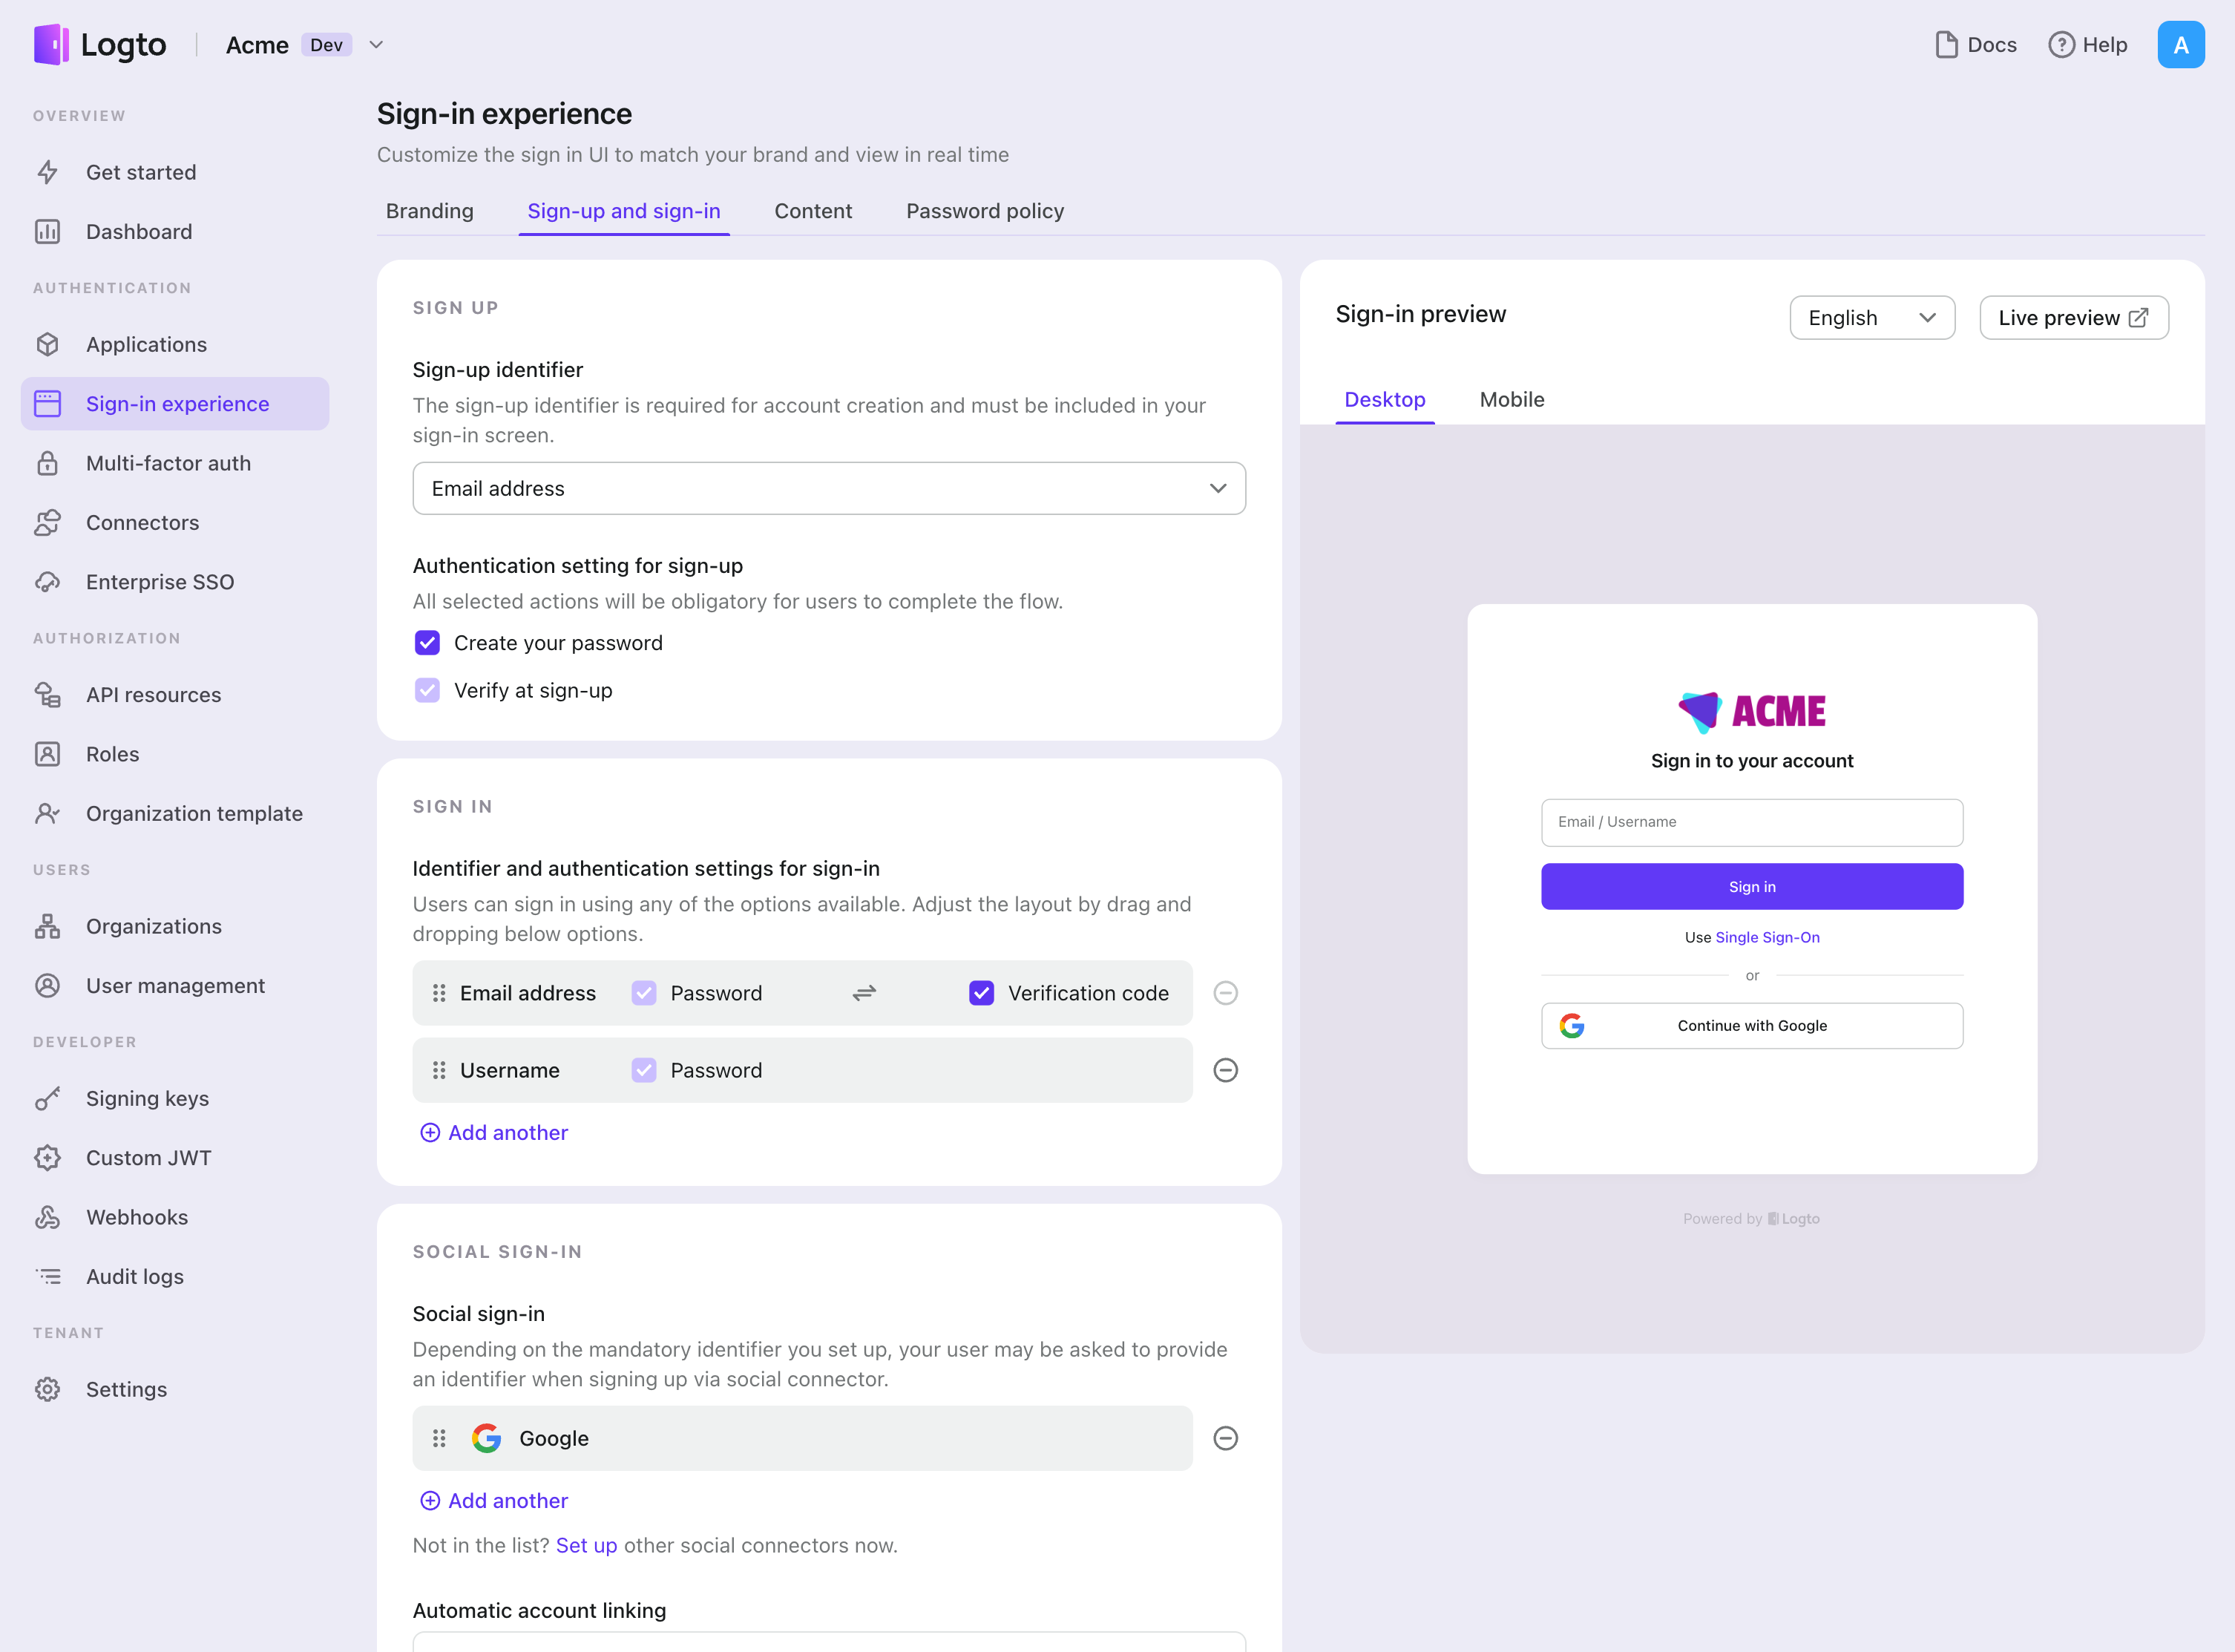
Once you create a social connector successfully, you can enable it as a "Continue with Facebook" button in Sign-in Experience.
- Navigate to Console > Sign-in experience > Sign-up and sign-in.
- (Optional) Choose "Not applicable" for sign-up identifier if you need social login only.
- Add configured Facebook connector to the "Social sign-in" section.

Testing and Validation
Return to your Flutter app. You should now be able to sign in with Facebook. Enjoy!
Further readings
End-user flows: Logto provides a out-of-the-box authentication flows including MFA and enterprise SSO, along with powerful APIs for flexible implementation of account settings, security verification, and multi-tenant experience.
Authorization: Authorization defines the actions a user can do or resources they can access after being authenticated. Explore how to protect your API for native and single-page applications and implement Role-based Access Control (RBAC).
Organizations: Particularly effective in multi-tenant SaaS and B2B apps, the organization feature enable tenant creation, member management, organization-level RBAC, and just-in-time-provisioning.
Customer IAM series Our serial blog posts about Customer (or Consumer) Identity and Access Management, from 101 to advanced topics and beyond.